Cart
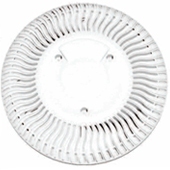
Suction Cleaner

Close
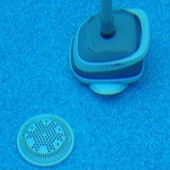
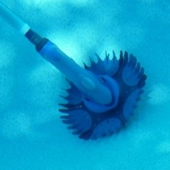
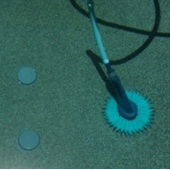
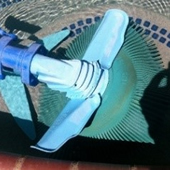
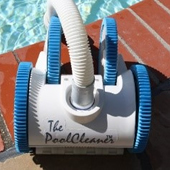
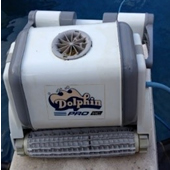
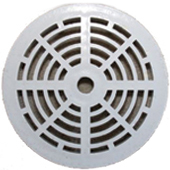
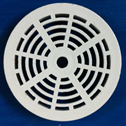
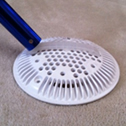
You have a “suction cleaner” with a water hose that comes out of the top of the cleaner and plugs into the skimmer or pool wall, similar to those pictured below.
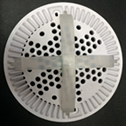
Customers report that in some cases, two clips installed in a “plus” pattern on each drain cover is needed because of the variables involved in the particular application.
Below are a few examples of suction cleaners.
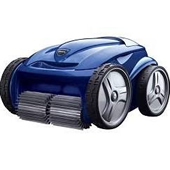
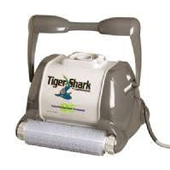
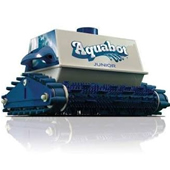
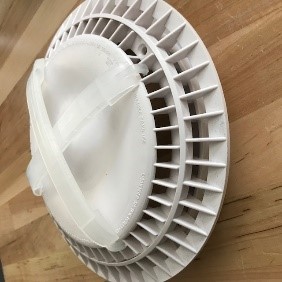
Robotic Cleaner
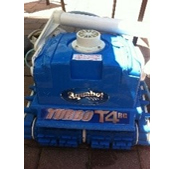
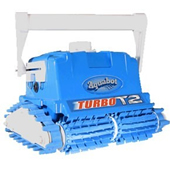
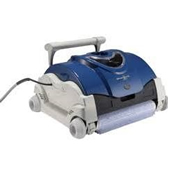
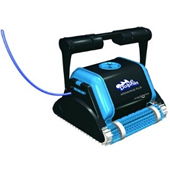
Close
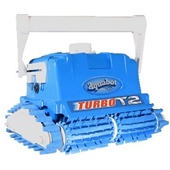
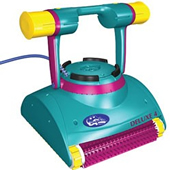
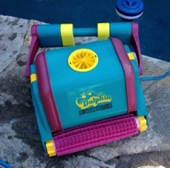
There are a wide variety of main drain covers and robotic cleaners in use today, and many possible combinations of drain covers and robotic cleaners.
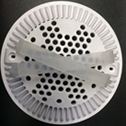
Main Drain Clip-On has had mixed success preventing “robotic” cleaners from getting stuck on the main drain cover. With two clips installed on each drain cover some customers report that the clips prevent the “robot cleaner” from getting stuck, however, other customers say that the robot cleaner still gets stuck from time to time. Some customers report that the clips make the situation worse.
Even though we have a low return rate, Main Drain Clip-On makes it a policy to let customers with “robotic” cleaners know about our results.
Main Drain Clip-On recommends that you use two clips installed in a “plus” pattern on each drain cover because the clips are only ¾ inch wide, and the intake slots for many of the robotic cleaners is wider than ¾ inch and can cause the cleaner to hang up on the clip.Below are a few examples of robotic cleaners.
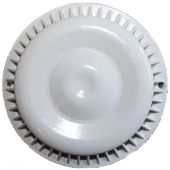
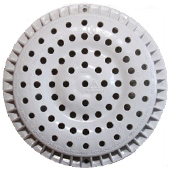
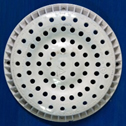
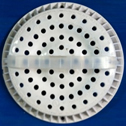
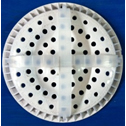
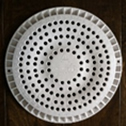
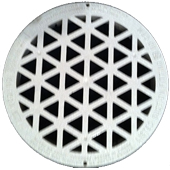
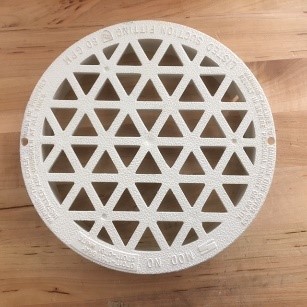
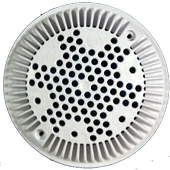
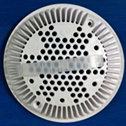
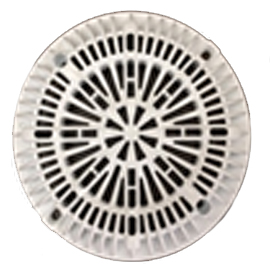
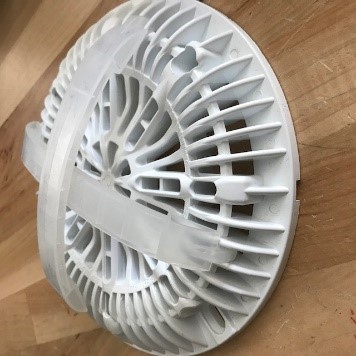
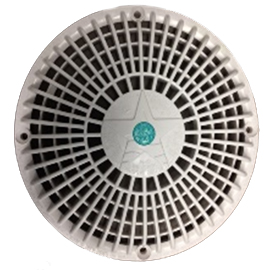
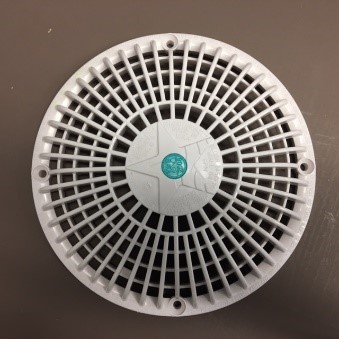
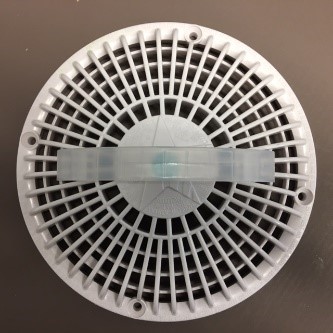
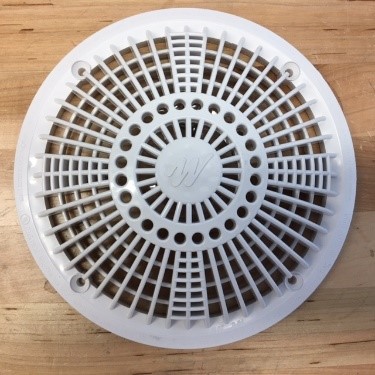
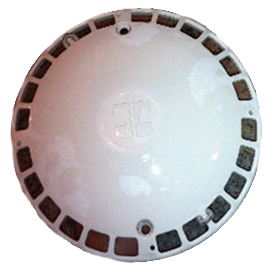
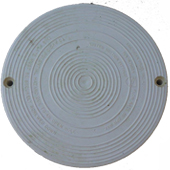
Style "A" Drain Covers
Close
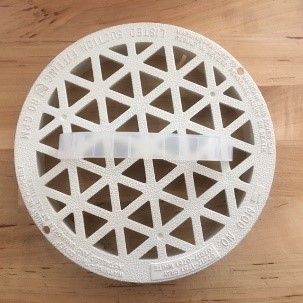
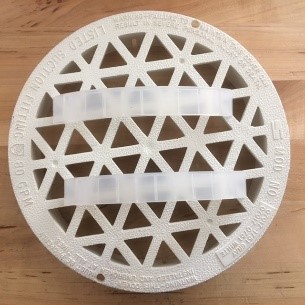
The D1 clip fits main drain covers similar to the Style "A" pictured above. Depending on the drain cover manufacturer, the distance between the holes on the drain varies from 6-0” inches to 6-5/8” inches.
If the distance between the holes on your drain is from 6-0" to 6-3/8" apart, the D1 SMALL clip will fit. If the distance between the holes on your drain is from 6-3/8" to 6-3/5" apart, the D1 LARGE clip will fit.
For more information on measuring your drain size, please see our instructions on using your pool net to measure you drain here.
For detailed instructions on installing your drain clip, download our PDF here.
Below are a few examples of Type A drain covers
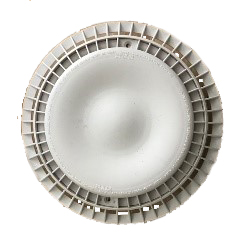
Style "B" Drain Covers
 Style B 8" Cover
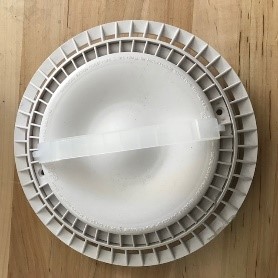
 D1 Large Clip on a Style B 8" cover
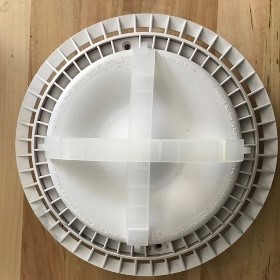
 Two D1 Large Clips on a Style B 8" cover
 Style B 10" Cover

D1 Extended Clip on a Style B 10" cover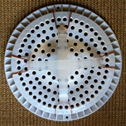 Two D1 Extended Clips on a Style B 10" cover
Close
The Style "B" Cover has a unique "salt and pepper shaker" look when viewed from the top. Below you can see some examples of the Style "B" drain covers in both 8 and 10 inch sizes. Notice that the 10" inch Style "B" cover has a lot more holes on top than the 8" inch size. The D1 Large Clip fits the 8" inch Style "B" drain cover and the D1 Extended Clip fits the 10" inch Style "B" drain cover.
For detailed instructions on installing your drain clip, download our PDF here.
Usually, one clip per drain cover is all that is needed. However, in some cases a second clip may be required.
Style B 8" Cover
*Note there are fewer holes on the top of the 8 inch cover than on the 10 inch cover
D1 Large Clip on a Style B 8" cover
Two D1 Large Clips on a Style B 8" cover
Style B 10" Cover
*Note there are more holes on the top of the 10" cover than on the 8 inch cover.
D1 Extended Clip on a Style B 10" cover
Two D1 Extended Clips on a Style B 10" cover
Style "C" Drain Covers
 Style C Drain Cover
 D2 Clip on a Style C Drain cover
Close
The Style “C” Drain Cover is an old style cover that is no longer available because it does not comply with current safety regulations for swimming pools (anti entrapment and anti-vortex VGB rules). The cover is flat with the pool bottom.
The D2 Clip will fit this style drain cover but must be install as pictured to allow the clip to grip (pinch) the underlying cover as pictured below.
Style C Drain Cover
D2 Clip on a Style C Drain cover
Style "D" Drain Covers
Close
The Style “D” Drain Cover is an old style cover that is no longer available because it does not comply with current safety regulations for swimming pools (anti entrapment and anti-vortex VGB rules). Installing D2 Clips on the covers does not make the covers VGB compliant.
The cover is flat with the pool bottom.
The D2 Clip will fit this style drain cover but must be install as pictured to allow the clip to grip (pinch) the underlying cover as pictured below.
Below are a few examples of Type D drain covers
Style "E" Drain Covers
 D2 Clip on a Style E Drain cover
 D2 Clip on a Style E Drain cover
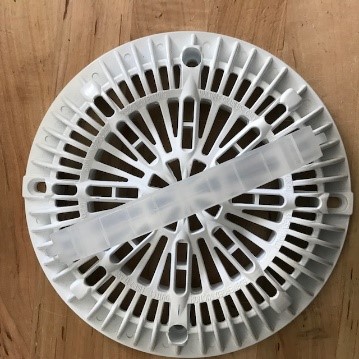
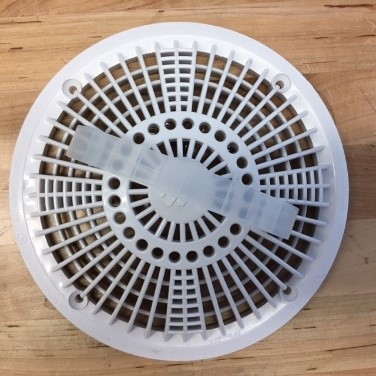
 One D1 Modified Clip on a Style E Drain cover
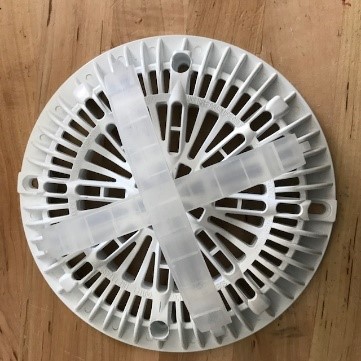
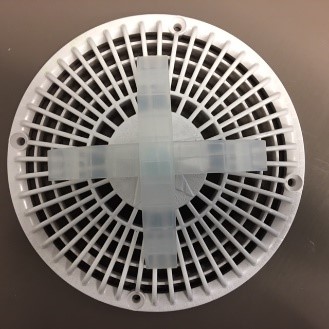
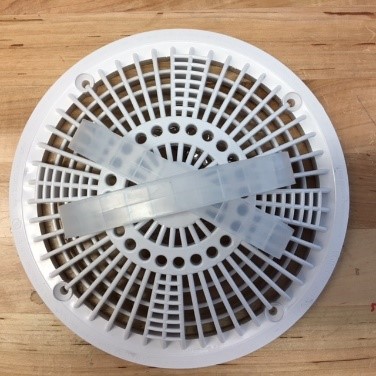
 Two D1 Modified Clips on a Style E Drain cover in a cross pattern
 Two D1 Modified Clips on a Style E Drain cover in a diagnonal pattern
 Close up of two D1 Modified Clips on a Style E Drain cover
Close
Style “E” Drain covers are the Hayward New Style Main Drain Cover (part number WGX1048E). The Hayward New Style Main Drain Cover - WGX1048E is a replacement drain cover.
We have two types of clips to fit this drain cover, the D2 Clip (low profile) and the D1 MODIFIED Clip (high profile).
For a detailed comparison of the Low and High Profile D2 Clips, please click here.
For detailed installation instructions, you can download our installation PDF for low profile here and high profile here.
The D2 clip installed on the Style “E” cover (pictured below) stands ½ inch above the underlying cover. Clip does not extend all the way across the cover. One clip per cover.
D2 Clip on a Style E Drain cover
D2 Clip on a Style E Drain cover
The D1 MODIFIED Clip (high profile) installed on the Style “E” cover (pictured below) stands 1 inch above the underlying cover. Clip extends all the way across the cover. One or two clips per cover.
One D1 Modified Clip on a Style E Drain cover
Two D1 Modified Clips on a Style E Drain cover in a cross pattern
Two D1 Modified Clips on a Style E Drain cover in a diagnonal pattern
Close up of two D1 Modified Clips on a Style E Drain cover
Style "F" 10" Drain Cover
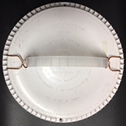 Single D1 EXTENDED Clip
 Dual D1 EXTENDED Clips
Close
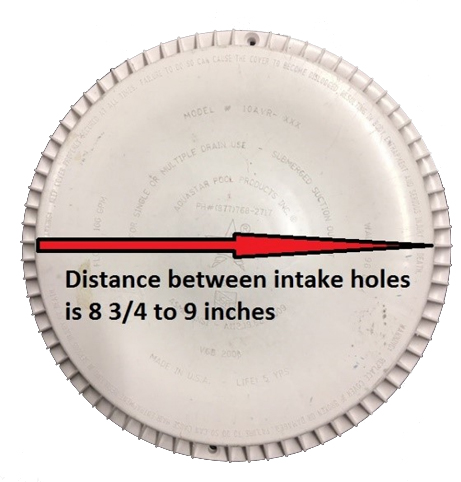
The Style F Drain pictured above is a 10 inch cover with a flat top. The distance between the intake holes on the cover measures 8 ¾ to 9 inches as shown.
D1 EXTENDED Clips may be installed manually or with the INSTALLATION TOOL or by hand.
For detailed installation instructions, you can download our installation PDF here.
Single D1 EXTENDED Clip
Dual D1 EXTENDED Clips
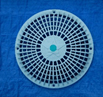
Style "G" 8" Drain Cover
Close
The Style G Drain pictured above is an 8 inch CMP Galaxy style cover.
D1 SMALL Clips may be installed manually or with the INSTALLATION TOOL or by hand.
For detailed instructions on installing your drain clip, download our PDF here.
Below are a few examples of Type G drain covers
Style "H" 8" Drain Cover
Close
The Style H Drain pictured above is an 8 inch Aquastar style drain cover.
D2 MODIFIED Clips may be installed manually or with the INSTALLATION TOOL or by hand.
Aquastar 8 inch drain covers with D2 MODIFIED clips. Note: D2 MODIFIED clips also fit Aquastar 10 inch drain covers.
Waterways 10 inch drain covers with D2 MODIFIED Clips installed. Note: D2 MODIFIED Clips also fit Waterways 8 inch cover.
Style "I" Drain Cover

Close
The Style I Drain pictured above is a Hayward main drain cover, old style with a dombed top..
D1 LARGE Clips may be installed manually or with the INSTALLATION TOOL or by hand.
Old Hayward drain cover with D1 LARGE clips
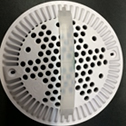
Style "J" Drain Cover
Close
For detailed instructions on installing your drain clip, download our PDF here.
Below is an example of a Type J drain cover with D1 Clips installed
Flat Style Drain Covers
 D1 Clip, Size: Extended (6.5 inch) clip fits this cover
 D1 Clip, Size: Extended (8 inch) clip fits this cover
Close
D1 Clip, Size: Extended (6.5 inch) clip fits this cover
FLAT Style main Drain Covers have two sizes. The Flat 6.5 inch Drain Cover has two mounting screws and is 6 ½ inches across (diameter) as pictured below..
D1 Clip, Size: Extended (8 inch) clip fits this cover
The Flat 8 inch Drain Cover has four mounting screws and is 8 inches across (diameter) as pictured below.
For detailed installation instructions, you can download our installation PDF here.
Other Style Drain Covers
 10" Style A Cover
 10" Style A Cover
 Hayward Cover
 Aquastar Cover
 SDX Paramount Retro Cover
Close
If your cover looks like any of the covers pictured below, please give us a call at (805) 419-3680,
or visit out contact page and send us an email.
10" Style A Cover
10" Style A Cover
Hayward Cover
Aquastar Cover
SDX Paramount Retro Cover
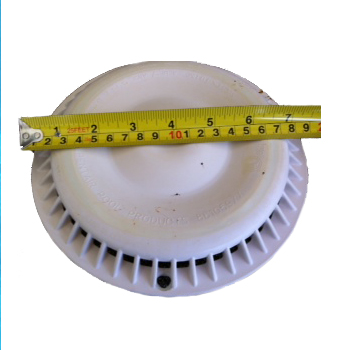
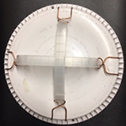
Help Me Measure
Close
You can use your pool basket as a measuring device. Put two strips of electricians tape on the “scoop” edge of your pool basket, separated by 6-3/8” inches as pictured below. From the side of the pool, place the basket “scoop” edge over your pool drain to measure the distance between the holes on the pool drain cover.